Thursday, July 16, 2015

Oh the Things Modge Podge Can Do! *3*

So it was some time ago that my mom gave me a couple of black bookshelves which were nice and all, but for my own tastes what I really thought would be cool would be something on the brighter more colorful side. I had successfully painted a couple of white
bookshelves in the past, and so I thought that I would challenge myself by giving one of my black shelves a makeover. What you see in the pictures is the final result, which turned out well enough that I don't think you would have guessed that it had originally been black. What I first did was paint the whole thing over with several coats of pink paint. The paint did not have any fancy gloss finishing to it, so even after numerous coats of paint it still looked sort of dry and unfinished. That was when the idea of using modge podge came in. If you don't know, modge podge is basically an adhesive that is sold in jars in the craft sections of many stores like Wal Mart or specialty craft shops like Hobby Lobby and Michael's. People often use them as a final sealant over paintings or projects to give that final glossy finishing touch. There are numerous varieties of modge podge, some being totally clear and others having a slight tint to them. I chose the rose tinted kind as I thought it would go well with the pink base that I had already put on the bookshelf. The tricky thing about modge podge is applying it so that it dries as evenly and as clearly as possible. The thing to remember is that applying modge podge to things is basically like painting on glue, so it will dry on thick as is, often times resulting in a streaked appearance. This becomes even more apparent when you apply the tinted kind. To get around this I thinned out the modge podge with some water. When you do so you might think at first that it looks too runny, but I've learned that modge podge can never be too runny and usually the runnier the better. Diluting it with the water thins the adhesive out and results in an even glossy coating to finish off the project. The gloss definitely did make the shelf look more finished, though some areas were a bit streaky from some earlier trial runs with the modge podge. So...to give it that final FINAL finishing touch, I added a red blotched pattern with paint all over, used the same paint to
color the frame, and then spread a little bit of glitter paint all over. The result: an awesome bookshelf to proudly display your most girliest things! *3* I chose to use it for holding some of my shoes, especially the ones with more color, patterns and bling. I think that it adds a nice glamorous touch to the bedroom. <3

Thursday, April 10, 2014

Past Artwork

So I thought I'd continue posting some past artwork of mine. As I've started painting again I decided to begin the art selection with some watercolor paintings I did several years ago: 

Watercolor #1: so the materials used weren't anything fancy, just some watercolor pencils on construction paper. This one is like most of my paintings in that I usually don't plan things ahead; just start doodling and experimenting with colors and see where it goes. I ended up liking the red with blue a lot and I really liked how the watercolor strokes came out on the paper. Comes to show that you don't need to have expensive materials to make something to your liking.
    
Watercolor #2: I tried painting a window with a curtain nearby at the beginning of this one which it may still resemble, but ultimately I ended up laying down some bright colors and defining the areas around with lots of black and dark brown strokes. I'm pretty sure that this one was done on watercolor paper.
This is a pencil drawing that I did some time ago on loose leaf. I've always felt the most amount of flexibility and control when drawing or painting with a utensil that I can firmly hold in my hand (like the watercolor pencils). Drawings like this usually start with me doodling a little with pencil and end with me feverishly layering on lines to define the image to my liking.
I consider this some practice drawing of what I ultimately envision to be a painting. Now the source of this is not at all mine; when I drew this years ago I was trying to get the shading down on a Tamara de Lempicka painting: Le Dormeuse. I always found that painting to be relaxing to look at and plan on someday taking the time to recreate my own. 
So I'm really not trying to sound cliched here but I think that I drew this on a Fall day. I don't know..... the leaves, wind, and colors at the time made me feel like drawing a red riding hood type of person taking a fall afternoon stroll. I'm not sure where it is at the moment but I think that it was around the same time that I drew a tree with a bunch of crayon pastels that looked a tiny bit like the tree in the background. The drawing spanned multiple loose leaf papers and made for some really nice wall art. I'll post it on this blog if I find it again.

And to mix things up here is a painting of Miffy that I did one or two years ago (I think). I always liked how cute and simple the drawings in those books were, and just felt like making a larger version for myself to hang up by the crafting corner of my place. Nowadays if I want to paint I'll buy a cork board at a thrift store really cheap (up to this point I think that the most I've ever had to pay was two dollars) and just paint over that. It's perfect because once you're done you can hang it up and don't have to worry about framing it. A much cheaper option to painting than the traditional canvas route.

Another pencil drawing. It was around the same time that I was producing the other pencil drawings that I was trying to get better at drawing people. For this one I chose as my subject one of my most favorite flappers: Louise Brooks. She also inspired the dolls that I made and posted on the blog some time ago. I haven't committed to the same amount of practice that I had those years ago lately but from what I remember the most challenging thing for me was in balancing the facial features. Drawing individual components of the face are not hard: I can do eyes, noses, lips just fine. It's balancing them out that's difficult. Most of the time I space things out too closely together. 

Those viewers who checked out my last blog post will have seen lots of yellow, red, black and orange lines and rectangles. Those were illustrations I created through Paint to make cleaner more polished and printable versions of the original artwork they were based off of (basically crayon colored squares on graphing paper). This one obviously follows a different color scheme and pattern than those (I was thinking of water when making this one). I would love to turn this into a painting and/or a quilt. Right below this is another example of my crayons on graphing paper art. :-) 


So yeah.... that's all for now folks! ;-D

Sunday, March 30, 2014

Some Patterns Old and New

These little art pieces are both recent and old. The originals they're based off of I created 6 years ago or so. It was basically one afternoon that I had a bunch of crayons and graphing paper and decided to color within the lines to make my own colorful patterns. It was a simple and addicting activity, and I ended up spending the rest of the day churning out one abstract looking pattern after another. The patterns were stored in a binder and forgotten until this new year. I liked the originals as much as I did those years ago, and as a renewed activity I decided to recreate the patterns within Paint. The results are a lot cleaner looking than the smudgy crayon versions, which I am happy about. I'm not finished recreating all of the originals, so it is very possible that I will have a future post with more abstract looking lovelies. :-) The last one looks a bit different than the rest because it's the beginning of the ones that I made with a different color palette. Think of it as a prelude for things to come. ;-D


Wednesday, January 29, 2014

Just Bead It! More Craftista Made Necklaces ;D

So this is just a quick update of necklaces that I've made, some recent some not so much but colorful enough to merit posting on my blog. The first picture features what I've been experimenting with recently, necklaces more on the woven side requiring the use of a thread and needle (plus patience!). The remaining necklaces were mostly hand strung. The very bright green and pink ones are made of glass beads surprisingly, which I found at Hobby Lobby.


Sunday, January 26, 2014

Valentines Day Craft Idea: Bottle Cap Pins

Hello hello hello! With February and Valentine's Day drawing near I thought I'd share one of my more recent projects inspired by the holiday: Owl Love Pins. The owl picture was cut out from a fabric I got at Joann Fabrics; the fabric is basically covered all over with them, so snipping out a few owls won't make any noticeable difference ;D. Cutting out a square with one owl in the middle and wrapping around a Snapple bottle cap made the centerpiece. After that the work was mainly in beading the bottle cap so as to frame the owl in center. I stuffed the inside of the cap with a little bit of cotton stuffing material. Sealing that up with a felt circle and sewing a bar pin to the back finally made it into a full fledged owl pin! May this bit of Valentine's Day accessory awesomeness inspire you all to make your own bottle cap pins.

Monday, July 29, 2013

Just Bead It! Part 2: Necklaces

Previously I virtually showcased a bunch of my shirt embellishments accomplished through Wal Mart plastic tub beads. This time the focus is on one of the obvious things that comes to mind with beading: necklaces! Although stringing a bunch of beads together sounds like a simple idea, I found that making these lovelies in some ways required much more creativity than previous shown embellishments. Many decisions come into play: how to make the most out of the limited number of beads that come in a single tub, what colors to combine, and how to balance large vs. small beads (just to name a few). Of course somebody could just string a bunch of small beads of the same color, shape and size together, but after a while that amount of repetition gets boring. You gotta mix things up! So that's what I did. I mixed things up, and in the end I was very happy with the results. :-) Ahhh...the joys of beading! 

Note: The purple and pink rose beads also came from Wal Mart but were not included in plastic value pack tubs. The purple flower beads in the third picture came from Hobby Lobby.


Monday, July 22, 2013

Just Bead It! ;-D Part I: Beaded Fashions

It's been a long time since an update I'll admit, but I say, "Once a craftista always a craftista!" In my opinion, a true craftista will always find the time to craft, and although this blog's posts have been scarce in recent times, I have been taking the time this past summer to explore a somewhat new realm of craft to me: beading. My posts from last summer showcase a lot of my fabric marker creations which included several colorful pillows that I had sewn acrylic gems onto. I view that embellishments part of that pillow making process to be sort of a foreshadowing to my current fixation on beads. 

As you browse through the pictures below, you will see lots of beaded clothes, hence the Part I Beaded Fashions title above. These projects really took off after I beaded a purple dress/top. If you would like to see a picture of which shirt I'm talking about, feel free to follow this link which will take you to my other blog about graph theory (this is an area of mathematics that I love love love <3). http://torus2torus.blogspot.com/2013/07/rocky-mountain-mathematics-consortium.html

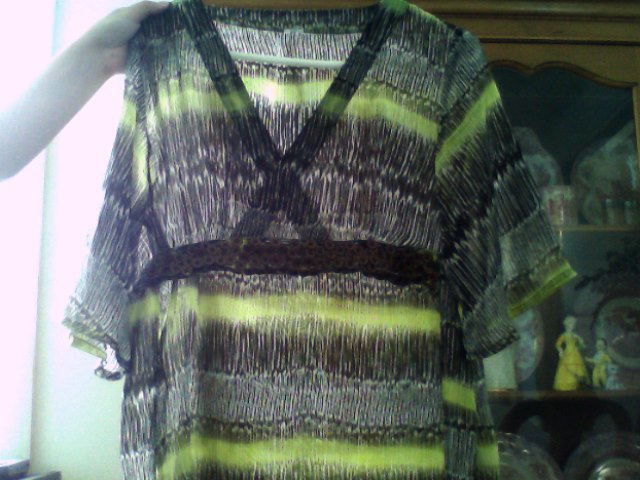
I loved that beaded result so much that I immediately started brainstorming bead embellishments for all of my other clothes. Many times when I point out the beading on my outfits to people one of the first things they ask me is if it takes a long time. I find beading to be an extremely rewarding and relaxing activity, so that combined with the practice really makes it a much faster thing to accomplish than most would guess. This is not asked of me often, but I also like to point out where the beads are from because I think that it adds to the specialness and novelty of the creations. Almost all of the beads that I use are from Wal Mart, which to some craftistas isn't the first store that comes to mind when thinking of craft supply stores. What's even more amazing about the bead origins is that they come in very cheap value tub bins, specifically they are all packed in these five dollar bins of plastic beads; an entire pound of them! I don't believe that they get as much attention as they deserve. Lots of people pass by them thinking that they are tubs of kids' beads, but in reality if you take the time to look through and sort them out you will see that they are actually gold mines! Looking through my beaded creations pictures below I think that you will see that many pretty, unique, and sophisticated embellishments can be accomplished with them, not to mention necklaces which will be the topic of the second part to this post topic. Enjoy! :-D

P.S. And as just a little side note I thought I'd clarify for those interested that the buttons for two of the tops did not come from previously described plastic Walmart bead value pack tub. The brown buttons came form a thrift store (they were selling whole bags of them for ten cents each) and the green buttons are just from the Wal Mart buttons section.